
Water damage is a concern that no homeowner can afford to ignore. Whether it’s the result of a sudden plumbing mishap, a leaky roof, or unforeseen flooding, water damage can wreak havoc on our homes, especially when it comes to our beloved wooden surfaces. The once-pristine woodwork that added warmth and charm to our living spaces can quickly turn into a nightmare when exposed to moisture.
Understanding Water Damage
Water damage is a persistent threat to the integrity and aesthetics of wooden surfaces in our homes. To effectively address this issue, it’s essential to understand both the causes and the types of damage that water can inflict on wood.
Common Causes of Water Damage to Wood Surfaces
- Leaky Roofs and Gutters: Roof leaks are a primary culprit when it comes to water damage. When your roof or gutters are in disrepair, rainwater can seep into the structural framework of your home, affecting the wooden beams and surfaces.
- Plumbing Issues: Burst pipes, leaky faucets, and malfunctioning appliances can release water into your home, damaging wooden floors, walls, and cabinets.
- Flooding: Natural disasters like floods or heavy storms can inundate your home with water, leading to extensive damage to wood surfaces if not addressed promptly.
- Condensation and Humidity: High indoor humidity levels and poor ventilation can lead to moisture accumulation, which can cause wood to swell, warp, and eventually rot over time.
Types of Water Damage to Wood
- Staining: Water can leave unsightly stains on wood surfaces. These stains can range from light discoloration to dark, deep marks. Stains are often caused by water carrying dirt, minerals, or chemicals that penetrate the wood’s pores.
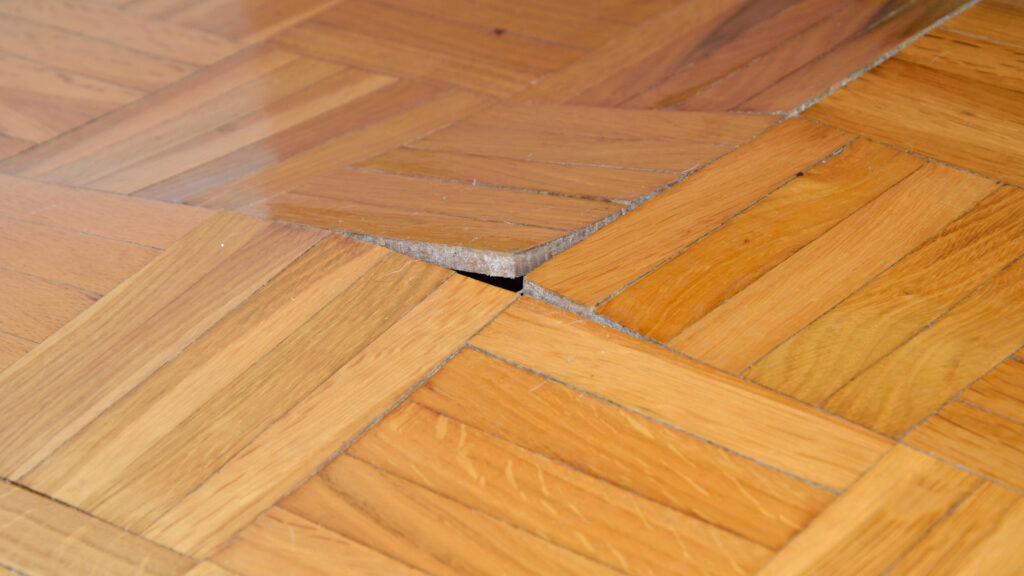
- Warping: When wood absorbs moisture unevenly, it can result in warping. Common types of warping include cupping (edges curl up), crowning (center becomes higher), or bowing (one edge bends while the opposite edge remains straight).
- Deterioration: Over time, prolonged exposure to moisture can cause wood to deteriorate. This may include rot, decay, or the growth of mold and fungi, which can compromise the structural integrity of the wood.
Tools and Materials
Before embarking on your DIY wood repair project, it’s crucial to gather the necessary tools and materials to ensure a smooth and successful restoration process. Here’s a comprehensive list of essentials you’ll need:
Tools:
- Safety Gear: Start with the basics. Safety goggles, dust masks, and work gloves are essential for your protection.
- Measuring Tools: A tape measure, carpenter’s square, and a level will help you accurately assess and plan your repairs.
- Saws: A circular saw or a hand saw for cutting damaged wood, as well as a coping saw for detailed work.
- Sanding Tools: Sandpaper in various grits (coarse to fine), a sanding block, and an electric sander if you have one.
- Wood Chisels: Useful for removing damaged or rotted wood.
- Putty Knife: For applying wood filler and scraping surfaces.
- Clamps: To hold wood pieces together while adhesive or filler dries.
- Paintbrushes and Rollers: If you plan on refinishing or painting the wood.
Materials:
- Wood Repair Products: Wood filler or epoxy wood filler for patching holes and gaps.
- Wood Preservative: To protect the repaired area from future moisture damage.
- Primer and Paint/Stain: If you’re planning to refinish the wood surface.
- Wood Glue: For securing loose joints or repairing splits.
- Sandpaper: In various grits (e.g., 80, 120, 220) for sanding the wood.
- Clean Cloth or Sponge: For cleaning and wiping surfaces.
- Drop Cloths or Plastic Sheeting: To protect surrounding areas from dust and debris.
Preparing for the Repair
Before diving into the repair process, it’s important to take some essential steps to ensure your safety and the effectiveness of your project.
Safety Precautions:
- Protective Gear: Always wear safety goggles, a dust mask, and work gloves when working with wood and power tools.
- Well-Ventilated Area: Work in a well-ventilated space or consider using a dust extraction system to minimize dust inhalation.
- Power Tool Safety: If using power tools, follow manufacturer’s instructions, and use safety features like blade guards.
Assessing the Extent of Damage:
- Thorough Inspection: Examine the water-damaged wood closely to determine the full extent of the damage. Look for staining, warping, or soft spots.
- Probe the Wood: Use a screwdriver or awl to gently probe the wood’s surface. Soft or spongy areas indicate rot or severe water damage.
- Document the Damage: Take notes or photos of the damaged areas. This will help you plan your repairs effectively.
- Plan the Repair: Based on your assessment, create a plan for repair, including the order in which you’ll address each issue and the materials needed.
Step-by-Step Repair Process
Now that you’ve gathered your tools and materials and taken the necessary safety precautions, it’s time to dive into the step-by-step process of repairing water-damaged wood. We’ll break it down into manageable steps, providing detailed instructions for each phase of the restoration.
Step 1: Removing Damaged Wood and Stains
- Start by identifying and marking the areas of the wood that are severely damaged. This may include stains, soft spots, or wood that has become structurally compromised.
- Carefully use your saws or chisels to remove the damaged sections. Make clean, straight cuts to create a smooth surface.
- For stubborn stains, you can try using a wood bleach or oxalic acid solution as directed by the manufacturer to lighten or remove discoloration.
Step 2: Drying Out the Affected Area
- Ensure that the area is completely dry before proceeding. Use fans or dehumidifiers to expedite the drying process, especially if the wood was exposed to significant moisture.
- Check for hidden moisture by using a moisture meter. Ensure that the moisture levels are within acceptable limits before moving on to the next step.
Step 3: Sanding and Smoothing the Surface
- Begin with coarse-grit sandpaper (around 80 grit) and progressively work your way to finer grits (e.g., 120, 220) to smooth the surface.
- Sand evenly and follow the wood grain to avoid creating uneven spots. This step helps remove any roughness left from cutting or chiseling.
- After sanding, wipe down the surface with a clean, damp cloth to remove dust and debris.
Step 4: Filling Gaps and Cracks
- Use wood filler or epoxy wood filler to fill any gaps, cracks, or imperfections in the wood. Follow the product instructions for mixing and application.
- Apply the filler generously and level it with a putty knife. Ensure that it’s flush with the surrounding wood surface.
- Allow the filler to dry completely. Depending on the product, this may take a few hours or overnight.
Step 5: Applying Wood Finish or Paint for a Seamless Look
- If you want to maintain the natural wood look, apply a wood finish like varnish, stain, or clear polyurethane. Follow the manufacturer’s instructions for application and drying times.
- For a painted finish, apply a primer first, followed by the paint color of your choice. Ensure even coverage and let each coat dry before applying the next.
- Sand lightly between coats for a smooth and professional finish.
Tips and Tricks
- Choose the Right Wood Filler: Select a wood filler that matches the color and type of wood you’re repairing for a seamless blend.
- Sand with Care: Take your time when sanding to achieve a smooth and uniform surface. Sanding in the direction of the wood grain yields the best results.
- Test Finishes: Before applying a finish or paint, test it on a small, inconspicuous area to ensure it matches your expectations.
- Maintain Proper Ventilation: Adequate ventilation is crucial when working with paints, stains, and wood finishes. Use a respirator mask if necessary.
- Follow Safety Guidelines: Always prioritize safety when using tools and chemicals. Refer to the manufacturer’s safety instructions.
By following these step-by-step instructions and implementing these tips and tricks, you’ll be well on your way to restoring your water-damaged wood surfaces with professional-quality results. Your efforts will not only bring back the beauty of your home but also ensure the longevity of your wooden features.
Conclusion
In this comprehensive guide, we’ve explored the essential steps to repair water-damaged wood surfaces in your home. Armed with the right tools, materials, and knowledge, you can take on these projects with confidence and restore the beauty and integrity of your wooden features.
If you’re facing water damage issues that require professional assistance or if you have any questions regarding wood restoration, don’t hesitate to reach out to South Sound Water Recovery. We’re your trusted partner in preserving and enhancing your home.